How to upgrade SQL Server
The Wiki of Unify contains information on clients and devices, communications systems and unified communications. - Unify GmbH & Co. KG is a Trademark Licensee of Siemens AG.
The SQL Server Installation Center supports direct upgrades to SQL Server.The
setup program can successfully perform an in-place migration.In order to initiate the upgrade,proceed with the following steps:
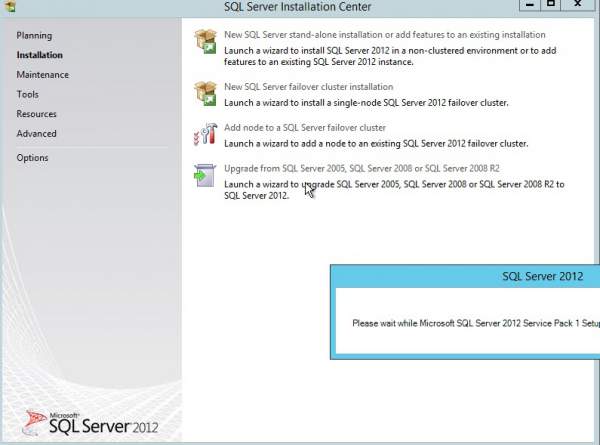
1. Launch the setup.exe program found in the installation media's root directory.The SQL Server Installation Center launches.
2. Click the Installation link in the navigation pane on the left side of the SQL Server Installation Center. This will display the Installation page.Click on the Upgrade from... option to launch the SQL Server installation wizard.
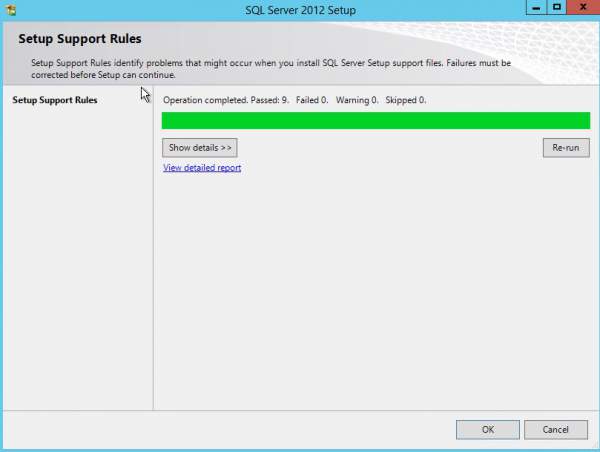
3. The installation wizard launches the Setup Support Rules to check if there are any system problems that would interfere with the upgrade.
If there are any problems that will prevent the upgrade from running, they'll be displayed in the rules list preceded by a yellow icon and the status will be listed as Fail. You must correct the problems before you can continue the upgrade. If the system passes all of the setup rules, the OK button will be enabled. Clicking OK from the Setup Support Rules dialog box displays the Product Key dialog box.
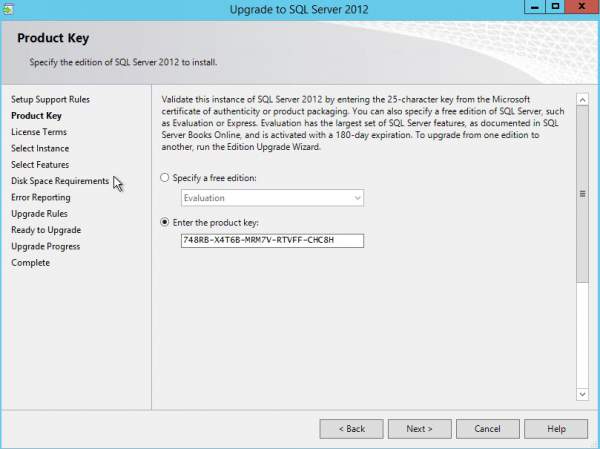
4. In the Product Key dialog box, you can either install the free Evaluation edition or enter your SQL Server product key.After entering the product key, click on Next, to display the License Terms dialog.
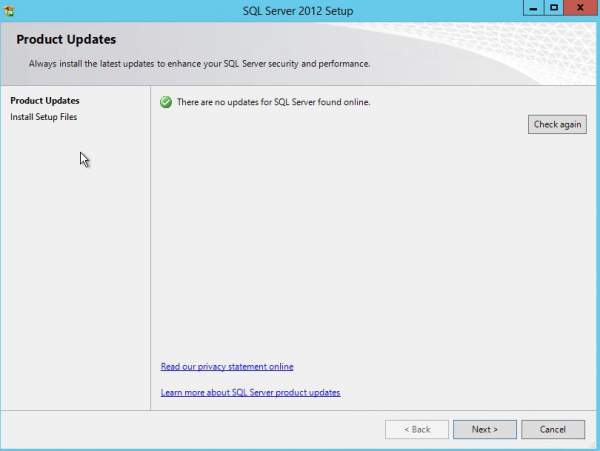
6. If there are available updates for SQL Server 2012, they'll be displayed in the Product Updates dialog box. You can optionally include these updates as a part of the migration process, ensuring that you complete your upgrade with the most current software updates.Selecting the Include SQL Server product updates check box will install this update as a part of the upgrade process.
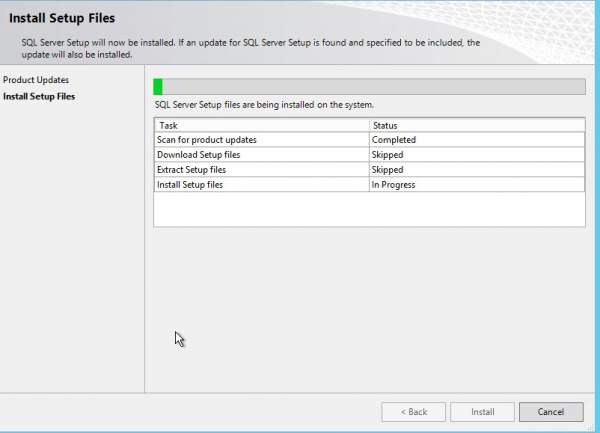
7. After you click Next in the Product Updates dialog box, the Install Setup Files dialog box will be briefly displayed. While this dialog box is displayed, the setup process will download the requested product updates and install them. You don't have to take any action on this screen. When the download and update process is complete, the Setup Support Rules dialog box will be displayed.
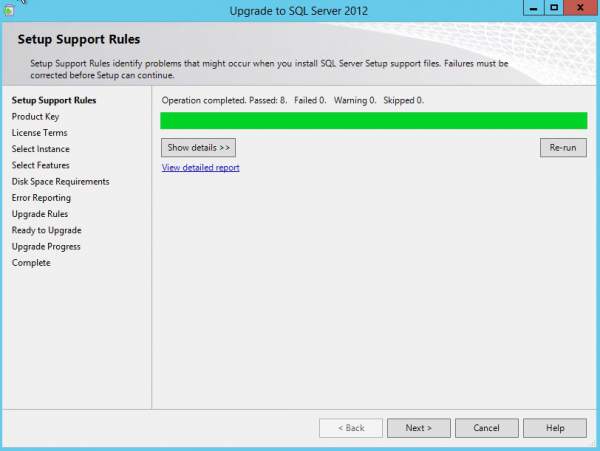
8. The Setup Support Rules dialog checks for any problems that might interfere in the upgrade process. Clicking the Show Details button will display the results. If there are problems that will prevent the upgrade, they'll be displayed in the rules list preceded by a yellow icon and the status of Fail will be displayed. You must correct any problems before proceeding. If all of the setup rules are passed, the rules will all be displayed with green check marks, and you can proceed with the upgrade.
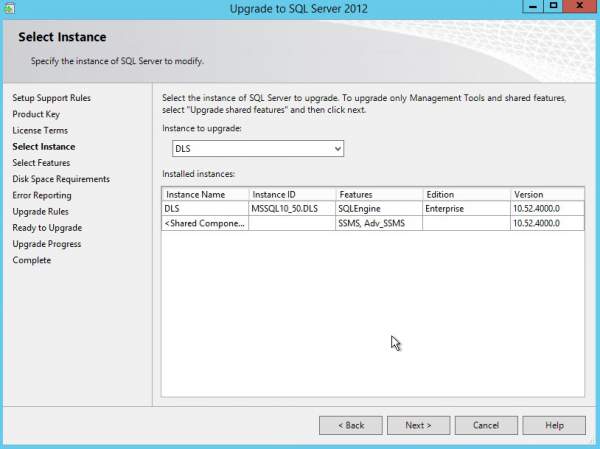
9. In the Select Instance dialog box, you specify the SQL Server instance that you want to upgrade. It's possible to have multiple instances installed on the same system and to upgrade them separately. SQL Server supports up to 50 instances on the same system, and each named instance is essentially a different installation of the SQL Server code.Clicking Next displays the Select Features dialog box.
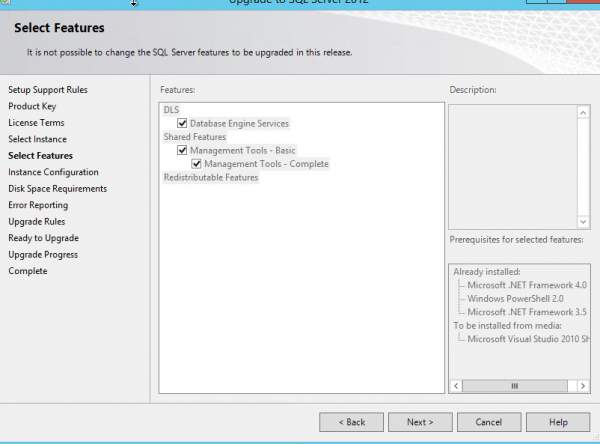
10. The Select Features dialog box shows you the installed features that will be upgraded. All of the installed options are checked by default—you can't choose to update only some of the features. When performing an upgrade,you must update all of the installed features in the selected instance at the same time. Clicking Next displays the Instance Configuration screen.
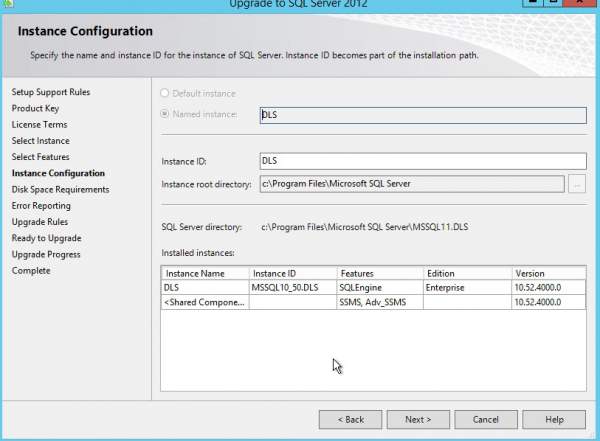
11. The upgrade process will detect all the installed SQL Server instances and list them in the Instance Configuration box at the bottom of the screen. You can choose to keep the installed instance name, or you can opt to change it. In most cases, you'll want the upgrade process to use the same SQL Server instance name. Clicking Next displays the Disk Space Requirements dialog box.
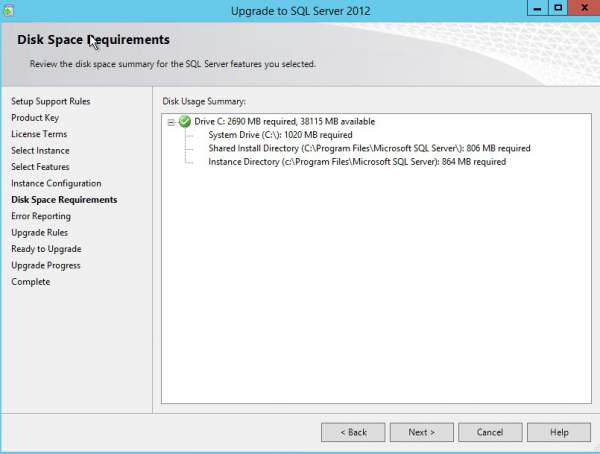
12. The Disk Space Requirements dialog box shows the disk space that will be required by the upgrade process, as well as the available disk space for the volume. It also displays the required disk storage for each installation directory. If there's adequate space to proceed with the installation, a green check mark will be displayed at the top of the screen. If there isn't enough disk space to perform the upgrade, a red X will be displayed. Click Next to display the Server Configuration dialog box.
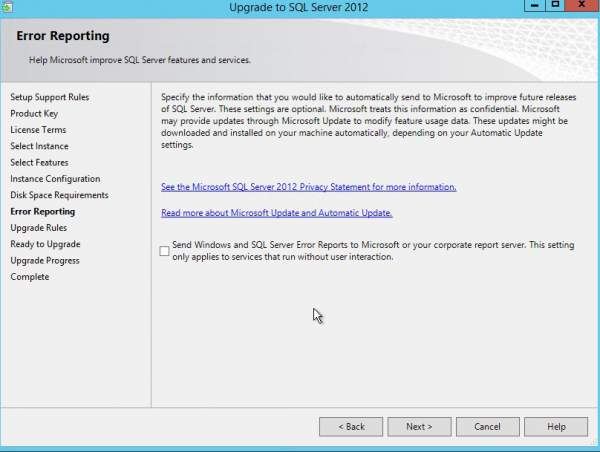
13. In the Error Reporting dialog box you can elect to send SQL Server error reports and usage information to Microsoft. This is optional. By default, the upgrade process won't send error reports to Microsoft. Click Next to display the Upgrade Rules dialog box, and then click the Show Details button.
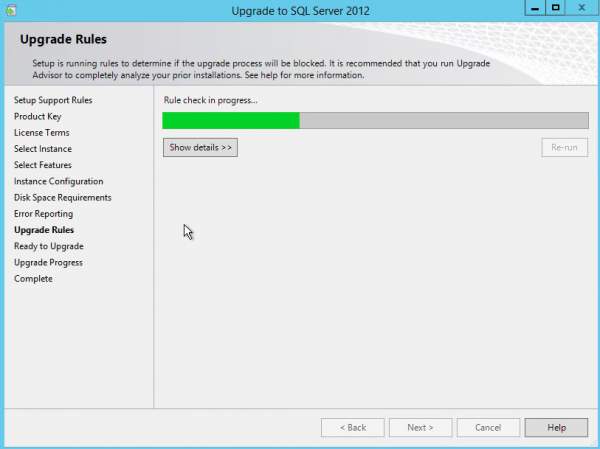
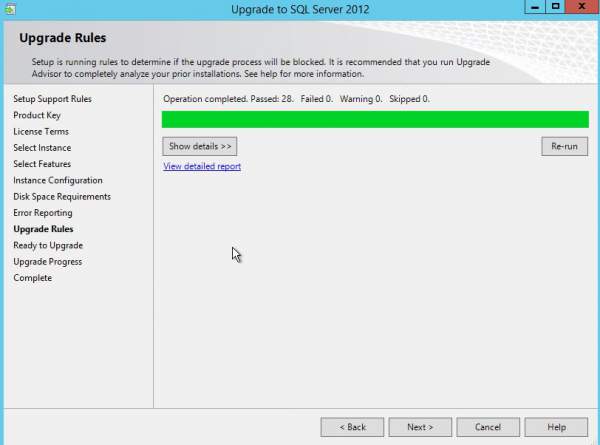
14. The Upgrade Rules dialog box reports the results of a final check for any problems that might cause the upgrade process to fail. If any error conditions are found, they'll be shown in the rules list preceded with a red X. If all the rules have green check marks, you can proceed with the upgrade.Clicking Next displays the Ready to Upgrade dialog box.
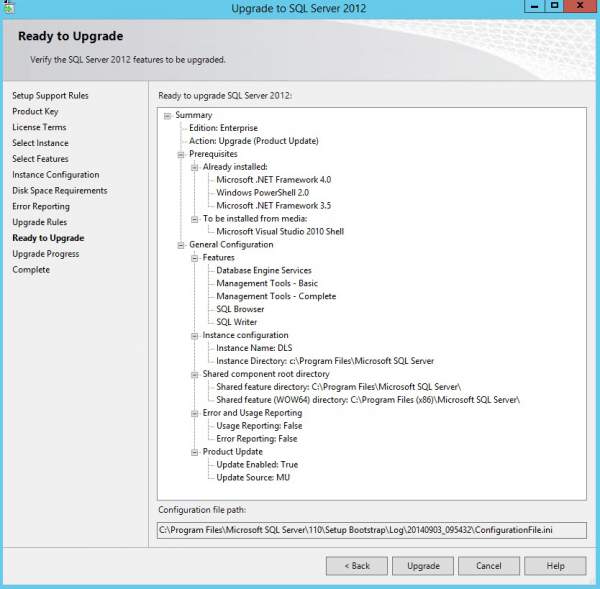
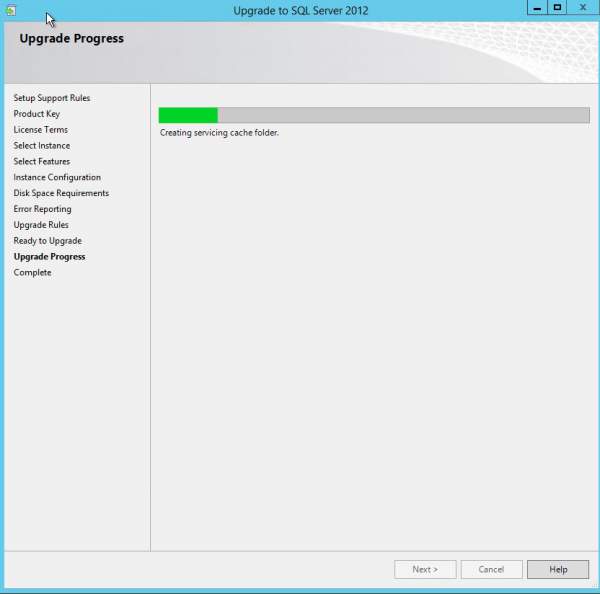
15. The Ready to Upgrade dialog box allows you to see a summary of the upgrade actions that will be performed. If you need to change anything, you can use the Back button to page back through the previous dialog boxes. If you don't need to make any changes, click the Upgrade button to launch the SQL Server upgrade process. The Upgrade Progress dialog box will be displayed showing the current action and status of the upgrade process.
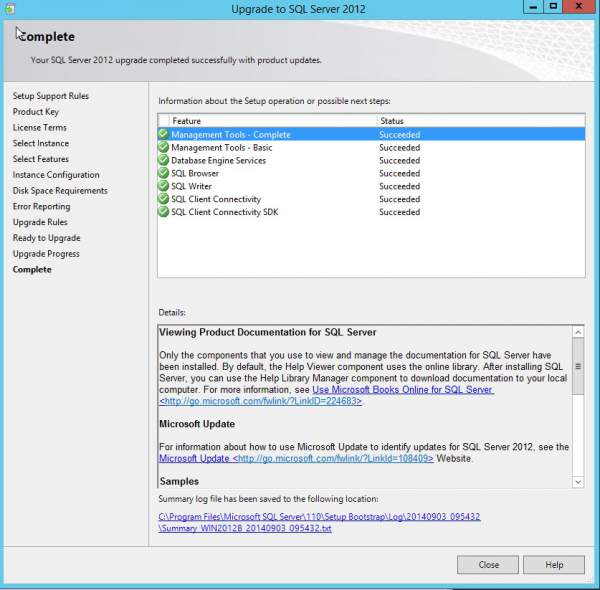
16. After the SQL Server upgrade operation is finished, the Complete dialog box will be displayed.
17. At that point, your SQL Server instance has been upgraded and you can begin using the SQL Server instance.

