Difference between revisions of "How do I add images and multimedia?"
The Wiki of Unify contains information on clients and devices, communications systems and unified communications. - Unify GmbH & Co. KG is a Trademark Licensee of Siemens AG.
(→Integrating Flash Movies) |
(→Uploading Files) |
||
| (33 intermediate revisions by 2 users not shown) | |||
| Line 1: | Line 1: | ||
| − | + | {{Breadcrumb|en|Wie füge ich Bilder und Multimedia hinzu?|Getting started}} | |
| − | {{ | ||
| − | |||
__TOC__ | __TOC__ | ||
| + | == General == | ||
| + | |||
| + | In order to display a graphic in Wiki, you must insert a reference to an existing graphic file into the article. Once a graphic file exists in Wiki, it can be used again in other articles. | ||
| + | |||
| + | When you want to use a new graphic, the easiest method is to first integrate it into the article (see [[#Integrating Graphics|Integrating Graphics]]) and then upload it by clicking on the red graphic link (see [[#Uploading Files|Uploading Files]]). | ||
| + | |||
| + | In this Wiki image references should be used as follows: | ||
| + | * [[JPEG]]: Photo, large sized pictures with high color depth | ||
| + | * [[PNG]]: Symbols, pictures with transparent contents | ||
| + | * [[GIF]]: Screenshots, other diagrams with small color depth, animated diagrams | ||
| + | |||
== Uploading Files == | == Uploading Files == | ||
| − | You can embed graphics in formats such as JPEG, GIF | + | You can embed graphics in formats such as JPEG, GIF and PNG and flash movies (SWF files) as well as sound files in MP3 format in your text in this Wiki. |
| − | To upload files in other formats, please refer to the information for | + | To upload files in other formats, please refer to the information for [[How do I provide files for download?]]. |
| − | + | To upload the relevant files, use the [[Special:Upload|Upload file]] link from the Toolbox links or klick on the already integrated graphic link. Then call up a form, which allows you to upload a file in one of the formats mentioned from your workspace onto the Wiki server. | |
| − | Select the desired file and | + | Select the desired file and assign an appropriate name for storing the file on the server (if you click on the graphic link the name is filled out automatically). Keep in mind that names such as ''screenshot-1.jpg'' or ''front-view.png'' are not suitable because presumably other articles in the Wiki will also have screenshots and front views. Use file names that describe the article for files that will probably only be referenced in your article. Each uploaded file must have a file name that is not already in use. Otherwise, you will receive an error message when you try to upload the file. |
Files uploaded to date appear in the [[Special:Imagelist|Image list]]. You can also check for file names here that you no longer know. You will need the precise file name if you are going to incorporate a graphic or if you want to reference a multimedia file. | Files uploaded to date appear in the [[Special:Imagelist|Image list]]. You can also check for file names here that you no longer know. You will need the precise file name if you are going to incorporate a graphic or if you want to reference a multimedia file. | ||
| + | |||
| + | Additionally product photos and user interface symbols are pooled on [[Product Photo Gallery]] and [[User Interface Symbols]]. | ||
== Integrating Graphics == | == Integrating Graphics == | ||
| Line 21: | Line 32: | ||
<nowiki>[[Image:Example.jpg]]</nowiki> | <nowiki>[[Image:Example.jpg]]</nowiki> | ||
| − | The following output will be generated as a result at the position where you annotate this: | + | The following output will be generated in our Wiki as a result at the position where you annotate this: |
[[Image:Example.jpg]] | [[Image:Example.jpg]] | ||
| Line 55: | Line 66: | ||
This generates the following output: | This generates the following output: | ||
| − | [[Image:Example.jpg|left|This is just an example]] The annotated text below flows to the | + | [[Image:Example.jpg|left|This is just an example]] The annotated text below flows to the right around the graphic in the case of a left-aligned graphic. This gives an elegant and professional impression in the presentation view. To demonstrate this more clearly, some dummy text is provided: Lorem ipsum dolor sit amet, consectetuer adipiscing elit, sed diam nonummy nibh euismod tincidunt ut laoreet dolore magna aliquam erat volutpat. Ut wisi enim ad minim veniam, quis nostrud exerci tation ullamcorper suscipit lobortis nisl ut aliquip ex ea commodo consequat. Duis autem vel eum iriure dolor in hendrerit in vulputate velit esse molestie consequat, vel illum dolore eu feugiat nulla facilisis at vero et accumsan et iusto odio dignissim qui blandit praesent luptatum zzril delenit augue duis dolore te feugait nulla facilisi. |
| − | You can show a graphic | + | You can show a graphic bordered with visible alternative text in order to make it look like a labeled slide. Example: |
<nowiki>[[Image:Example.jpg|framed|left|This is just an example]]</nowiki> | <nowiki>[[Image:Example.jpg|framed|left|This is just an example]]</nowiki> | ||
| Line 72: | Line 83: | ||
* Clarifying processes or procedures | * Clarifying processes or procedures | ||
| − | * Small tools, such as calculation | + | * Small tools, such as for calculation |
| − | * Slide shows | + | * Slide shows with a number of interrelated graphics or slides |
| − | Before you can integrate a flash movie, you have to upload the associated SWF file in the same way as a graphic file via the | + | Before you can integrate a flash movie, you have to upload the associated SWF file in the same way as a graphic file via the [[Special:Upload|Upload file]] link from the Toolbox links. Note that the SWF file, unlike a graphic file, is not displayed after it is uploaded. In the same way as with graphics, you have to note the file name that you assigned to the SWF file on the server. In case of doubt, you can check the [[Special:Imagelist|Image list]]. |
You can integrate a flash movie within your article as shown in the next example: | You can integrate a flash movie within your article as shown in the next example: | ||
| Line 87: | Line 98: | ||
Add the tag pair <tt><flash>...</flash></tt> at the position in the text where the flash movie is to be displayed. It is generally recommended to insert a blank line before and after the tag pair. If the flash movie is not yet aligned as desired, set another tag pair <tt><div>...</div></tt> around the tag pair <tt><flash>...</flash></tt>! | Add the tag pair <tt><flash>...</flash></tt> at the position in the text where the flash movie is to be displayed. It is generally recommended to insert a blank line before and after the tag pair. If the flash movie is not yet aligned as desired, set another tag pair <tt><div>...</div></tt> around the tag pair <tt><flash>...</flash></tt>! | ||
| − | You can change the appearance of the flash movie | + | You can change the appearance of the flash movie within the tag pair using parameters. All parameters are separated from one another by forward slashes. You can enter <tt>width</tt> (width of display), <tt>height</tt> (height of display), <tt>scale=exactfit</tt> (enforce the <tt>width</tt> and <tt>height</tt> entries for the display), as well as <tt>bgcolor</tt> (background color). |
== Integrating MP3 Files == | == Integrating MP3 Files == | ||
| Line 93: | Line 104: | ||
Authors can integrate sound files in MP3 format with ease in their article contents in this Wiki. This feature is intended for: | Authors can integrate sound files in MP3 format with ease in their article contents in this Wiki. This feature is intended for: | ||
| − | * Verbal descriptions, e.g. procedures | + | * Verbal descriptions, e.g. of procedures |
| − | * Sound playback, e.g. ringtones | + | * Sound playback, e.g. of ringtones |
* Playing announcements | * Playing announcements | ||
MP3 files are integrated in the article content in the form of a small MP3 player. The user can use the control functions of the player in order to play or stop an MP3 file or to repeat the play process. The MP3 player is in effect a flash movie. The player in question in this case is the [http://www.marcreichelt.de/spezial/musicplayer/ Easy musicplayer for Flash (EMFF)] from Marc Reichelt, which like this Wiki is under Creative Commons license. | MP3 files are integrated in the article content in the form of a small MP3 player. The user can use the control functions of the player in order to play or stop an MP3 file or to repeat the play process. The MP3 player is in effect a flash movie. The player in question in this case is the [http://www.marcreichelt.de/spezial/musicplayer/ Easy musicplayer for Flash (EMFF)] from Marc Reichelt, which like this Wiki is under Creative Commons license. | ||
| − | Before you can integrate an MP3 player, you have to upload it from the Toolbox links in the same way as a graphic file via the | + | Before you can integrate an MP3 player, you have to upload it from the Toolbox links in the same way as a graphic file via the [[Special:Upload|Upload file]] link. The MP3 file must have a sampling rate of 44.1 kHz. Note that the MP3 file is not played following uploading. In the same way as with graphics, you have to take note of the file name that you gave the MP3 file on the server. In case of doubt, you can check the [[Special:Imagelist|Image list]]. |
You can integrate an MP3 file within your article as shown in the next example: | You can integrate an MP3 file within your article as shown in the next example: | ||
| Line 109: | Line 120: | ||
<mp3>src=Example.mp3|text=<strong>Powerwords</strong>, 24 seconds, 213 Kbyte</mp3> | <mp3>src=Example.mp3|text=<strong>Powerwords</strong>, 24 seconds, 213 Kbyte</mp3> | ||
| − | Add the tag pair <tt><mp3>...</mp3></tt> at the position in the text | + | Add the tag pair <tt><mp3>...</mp3></tt> at the position in the text where the player is to be displayed for playing the MP3 file. It is generally recommended to insert a blank line before and after the tag pair. |
| − | Within the tag pair <tt><mp3>...</mp3></tt> use the <tt>src=</tt> parameter to specify the name of the desired MP3 file. You can add descriptive text for the sound file after this with | + | Within the tag pair <tt><mp3>...</mp3></tt>, use the <tt>src=</tt> parameter to specify the name of the desired MP3 file. You can add descriptive text for the sound file after this with <tt>text=</tt> parameter, separated by an oblique. The text may also contain simple HTML formatting. |
| − | == | + | == Image Galleries == |
| − | + | Image galleries are offered in some cases as a supplement to descriptions, for example screenshots on the processes involved in software configuration. For this purpose, this Wiki offers the possibility of placing galleries with preview images in an article. The advantage of this is that it is not the possibly memory-intensive graphics themselves that are referenced in the text rather only their preview graphics. You do not need to worry in any case about creating the preview graphics yourself. The Wiki application automatically creates a number of versions of each graphic that you upload in different resolutions. | |
| − | + | An example of producing a gallery is given below: | |
<nowiki><gallery> | <nowiki><gallery> | ||
| Line 128: | Line 139: | ||
</gallery></nowiki> | </gallery></nowiki> | ||
| − | + | This produces the following output in the presentation view: | |
<gallery> | <gallery> | ||
| Line 139: | Line 150: | ||
</gallery> | </gallery> | ||
| − | + | All preview images are automatically clickable. The links lead to descriptive pages that are assigned automatically to each graphic. You can likewise edit these pages as an author, for example in order to add explanatory text. | |
| − | + | The gallery with the preview images is enclosed in the tag pair <tt><gallery>...</gallery></tt>. An image is added to each text row in between. The file name of the desired original graphic is specified with <tt>Image:(file name)</tt>. You can add a vertical bar followed by the desired image title after the file name. | |
== Additional Information == | == Additional Information == | ||
* You will find further information in the official MediaWiki manual on the page {{en}} [http://meta.wikimedia.org/wiki/Help:Images_and_other_uploaded_files Help:Images and other uploaded files] | * You will find further information in the official MediaWiki manual on the page {{en}} [http://meta.wikimedia.org/wiki/Help:Images_and_other_uploaded_files Help:Images and other uploaded files] | ||
Latest revision as of 17:34, 26 July 2011
Contents
General
In order to display a graphic in Wiki, you must insert a reference to an existing graphic file into the article. Once a graphic file exists in Wiki, it can be used again in other articles.
When you want to use a new graphic, the easiest method is to first integrate it into the article (see Integrating Graphics) and then upload it by clicking on the red graphic link (see Uploading Files).
In this Wiki image references should be used as follows:
- JPEG: Photo, large sized pictures with high color depth
- PNG: Symbols, pictures with transparent contents
- GIF: Screenshots, other diagrams with small color depth, animated diagrams
Uploading Files
You can embed graphics in formats such as JPEG, GIF and PNG and flash movies (SWF files) as well as sound files in MP3 format in your text in this Wiki. To upload files in other formats, please refer to the information for How do I provide files for download?.
To upload the relevant files, use the Upload file link from the Toolbox links or klick on the already integrated graphic link. Then call up a form, which allows you to upload a file in one of the formats mentioned from your workspace onto the Wiki server.
Select the desired file and assign an appropriate name for storing the file on the server (if you click on the graphic link the name is filled out automatically). Keep in mind that names such as screenshot-1.jpg or front-view.png are not suitable because presumably other articles in the Wiki will also have screenshots and front views. Use file names that describe the article for files that will probably only be referenced in your article. Each uploaded file must have a file name that is not already in use. Otherwise, you will receive an error message when you try to upload the file.
Files uploaded to date appear in the Image list. You can also check for file names here that you no longer know. You will need the precise file name if you are going to incorporate a graphic or if you want to reference a multimedia file.
Additionally product photos and user interface symbols are pooled on Product Photo Gallery and User Interface Symbols.
Integrating Graphics
You can generate a reference to a graphic in the simplest form with the syntax [[Image:(file name)]]. Example:
[[Image:Example.jpg]]
The following output will be generated in our Wiki as a result at the position where you annotate this:
You have to add a blank line before and after the graphic reference in order for the graphic to be displayed separately as in the example here as opposed to in the running text.
Graphics are always clickable in any case. The links lead to the page that is reserved for the graphic. You can enter as much additional information for the graphic on the relevant page.
You can add various texts after the file name, separated by vertical bars, which affect the look and feel of the graphic. The most important detail is an alternative text, which is displayed for example in pure text browsers instead of the graphic. Example:
[[Image:Example.jpg|This is just an example]]
This precise example is shown below. Move the mouse over the graphic. The alternative text is displayed as a tooltip window:
Even if you add a number of other details to the graphic, the alternative text should always be the last entry. Examples of aligned graphics with alternative text are given below.
[[Image:Example.jpg|center|This is just an example]]
This generates the following output:
[[Image:Example.jpg|right|This is just an example]] The annotated text below ...
This generates the following output:
The annotated text below flows to the left around the graphic in the case of a right-aligned graphic. This gives an elegant and professional impression in the presentation view. To demonstrate this more clearly, some dummy text is provided: Lorem ipsum dolor sit amet, consectetuer adipiscing elit, sed diam nonummy nibh euismod tincidunt ut laoreet dolore magna aliquam erat volutpat. Ut wisi enim ad minim veniam, quis nostrud exerci tation ullamcorper suscipit lobortis nisl ut aliquip ex ea commodo consequat. Duis autem vel eum iriure dolor in hendrerit in vulputate velit esse molestie consequat, vel illum dolore eu feugiat nulla facilisis at vero et accumsan et iusto odio dignissim qui blandit praesent luptatum zzril delenit augue duis dolore te feugait nulla facilisi.[[Image:Example.jpg|left|This is just an example]] The annotated text below ...
This generates the following output:
The annotated text below flows to the right around the graphic in the case of a left-aligned graphic. This gives an elegant and professional impression in the presentation view. To demonstrate this more clearly, some dummy text is provided: Lorem ipsum dolor sit amet, consectetuer adipiscing elit, sed diam nonummy nibh euismod tincidunt ut laoreet dolore magna aliquam erat volutpat. Ut wisi enim ad minim veniam, quis nostrud exerci tation ullamcorper suscipit lobortis nisl ut aliquip ex ea commodo consequat. Duis autem vel eum iriure dolor in hendrerit in vulputate velit esse molestie consequat, vel illum dolore eu feugiat nulla facilisis at vero et accumsan et iusto odio dignissim qui blandit praesent luptatum zzril delenit augue duis dolore te feugait nulla facilisi.You can show a graphic bordered with visible alternative text in order to make it look like a labeled slide. Example:
[[Image:Example.jpg|framed|left|This is just an example]]
This generates the following output in the presentation view:
Integrating Flash Movies
Authors can integrate flash movies with ease in their article contents in this Wiki. This feature is intended for:
- Clarifying processes or procedures
- Small tools, such as for calculation
- Slide shows with a number of interrelated graphics or slides
Before you can integrate a flash movie, you have to upload the associated SWF file in the same way as a graphic file via the Upload file link from the Toolbox links. Note that the SWF file, unlike a graphic file, is not displayed after it is uploaded. In the same way as with graphics, you have to note the file name that you assigned to the SWF file on the server. In case of doubt, you can check the Image list.
You can integrate a flash movie within your article as shown in the next example:
<flash>file=Colorpicker.swf|width=320|height=160|scale=exactfit|bgcolor=#ffffff</flash>
The example produces the following output in this case in the presentation view:
Add the tag pair <flash>...</flash> at the position in the text where the flash movie is to be displayed. It is generally recommended to insert a blank line before and after the tag pair. If the flash movie is not yet aligned as desired, set another tag pair <div>...</div> around the tag pair <flash>...</flash>!
You can change the appearance of the flash movie within the tag pair using parameters. All parameters are separated from one another by forward slashes. You can enter width (width of display), height (height of display), scale=exactfit (enforce the width and height entries for the display), as well as bgcolor (background color).
Integrating MP3 Files
Authors can integrate sound files in MP3 format with ease in their article contents in this Wiki. This feature is intended for:
- Verbal descriptions, e.g. of procedures
- Sound playback, e.g. of ringtones
- Playing announcements
MP3 files are integrated in the article content in the form of a small MP3 player. The user can use the control functions of the player in order to play or stop an MP3 file or to repeat the play process. The MP3 player is in effect a flash movie. The player in question in this case is the Easy musicplayer for Flash (EMFF) from Marc Reichelt, which like this Wiki is under Creative Commons license.
Before you can integrate an MP3 player, you have to upload it from the Toolbox links in the same way as a graphic file via the Upload file link. The MP3 file must have a sampling rate of 44.1 kHz. Note that the MP3 file is not played following uploading. In the same way as with graphics, you have to take note of the file name that you gave the MP3 file on the server. In case of doubt, you can check the Image list.
You can integrate an MP3 file within your article as shown in the next example:
<mp3>src=Example.mp3|text=<strong>Powerwords</strong>, 24 seconds, 213 Kbyte</mp3>
The example produces the following output in this case in the presentation view:
<mp3>src=Example.mp3|text=Powerwords, 24 seconds, 213 Kbyte</mp3>
Add the tag pair <mp3>...</mp3> at the position in the text where the player is to be displayed for playing the MP3 file. It is generally recommended to insert a blank line before and after the tag pair.
Within the tag pair <mp3>...</mp3>, use the src= parameter to specify the name of the desired MP3 file. You can add descriptive text for the sound file after this with text= parameter, separated by an oblique. The text may also contain simple HTML formatting.
Image Galleries
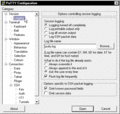
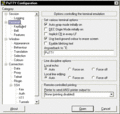
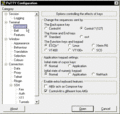
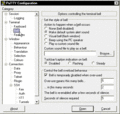
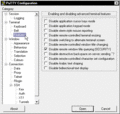
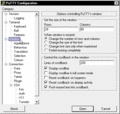
Image galleries are offered in some cases as a supplement to descriptions, for example screenshots on the processes involved in software configuration. For this purpose, this Wiki offers the possibility of placing galleries with preview images in an article. The advantage of this is that it is not the possibly memory-intensive graphics themselves that are referenced in the text rather only their preview graphics. You do not need to worry in any case about creating the preview graphics yourself. The Wiki application automatically creates a number of versions of each graphic that you upload in different resolutions.
An example of producing a gallery is given below:
<gallery>
  Image:Gallery-example-1.gif|PuTTy Configuration: Section "Logging"
  Image:Gallery-example-2.gif|PuTTy Configuration: Section "Terminal"
  Image:Gallery-example-3.gif|PuTTy Configuration: Section "Keyboard"
  Image:Gallery-example-4.gif|PuTTy Configuration: Section "Bell"
  Image:Gallery-example-5.gif|PuTTy Configuration: Section "Features"
  Image:Gallery-example-6.gif|PuTTy Configuration: Section "Window"
 </gallery>
This produces the following output in the presentation view:
All preview images are automatically clickable. The links lead to descriptive pages that are assigned automatically to each graphic. You can likewise edit these pages as an author, for example in order to add explanatory text.
The gallery with the preview images is enclosed in the tag pair <gallery>...</gallery>. An image is added to each text row in between. The file name of the desired original graphic is specified with Image:(file name). You can add a vertical bar followed by the desired image title after the file name.
Additional Information
- You will find further information in the official MediaWiki manual on the page
 Help:Images and other uploaded files

